Wednesday, November 21, 2012

THANKSGIVING TABLE 2012


I am almost ready! :)
It has been a day full of baking pies,
setting the table and preparing in advance some
the food for our Holiday dinner.

It has been a little crazy around here, but, I am happy to announce, our "sailor" is home!!! 
We picked him up at the airport at 1:00 am this morning and we were back up at five
 trying to get everything together.
Before my cooking marathon starts tomorrow, I wanted to share with you all our Thanksgiving table. 
This year, our son won't be able to be home for Christmas, so we went all out for Thanksgiving
 to make it as special as possible for him.

We will also have my BIL and his family joining us, which we don't get to do often, 
so we are hoping for a very special day, full of family gathering and good food.

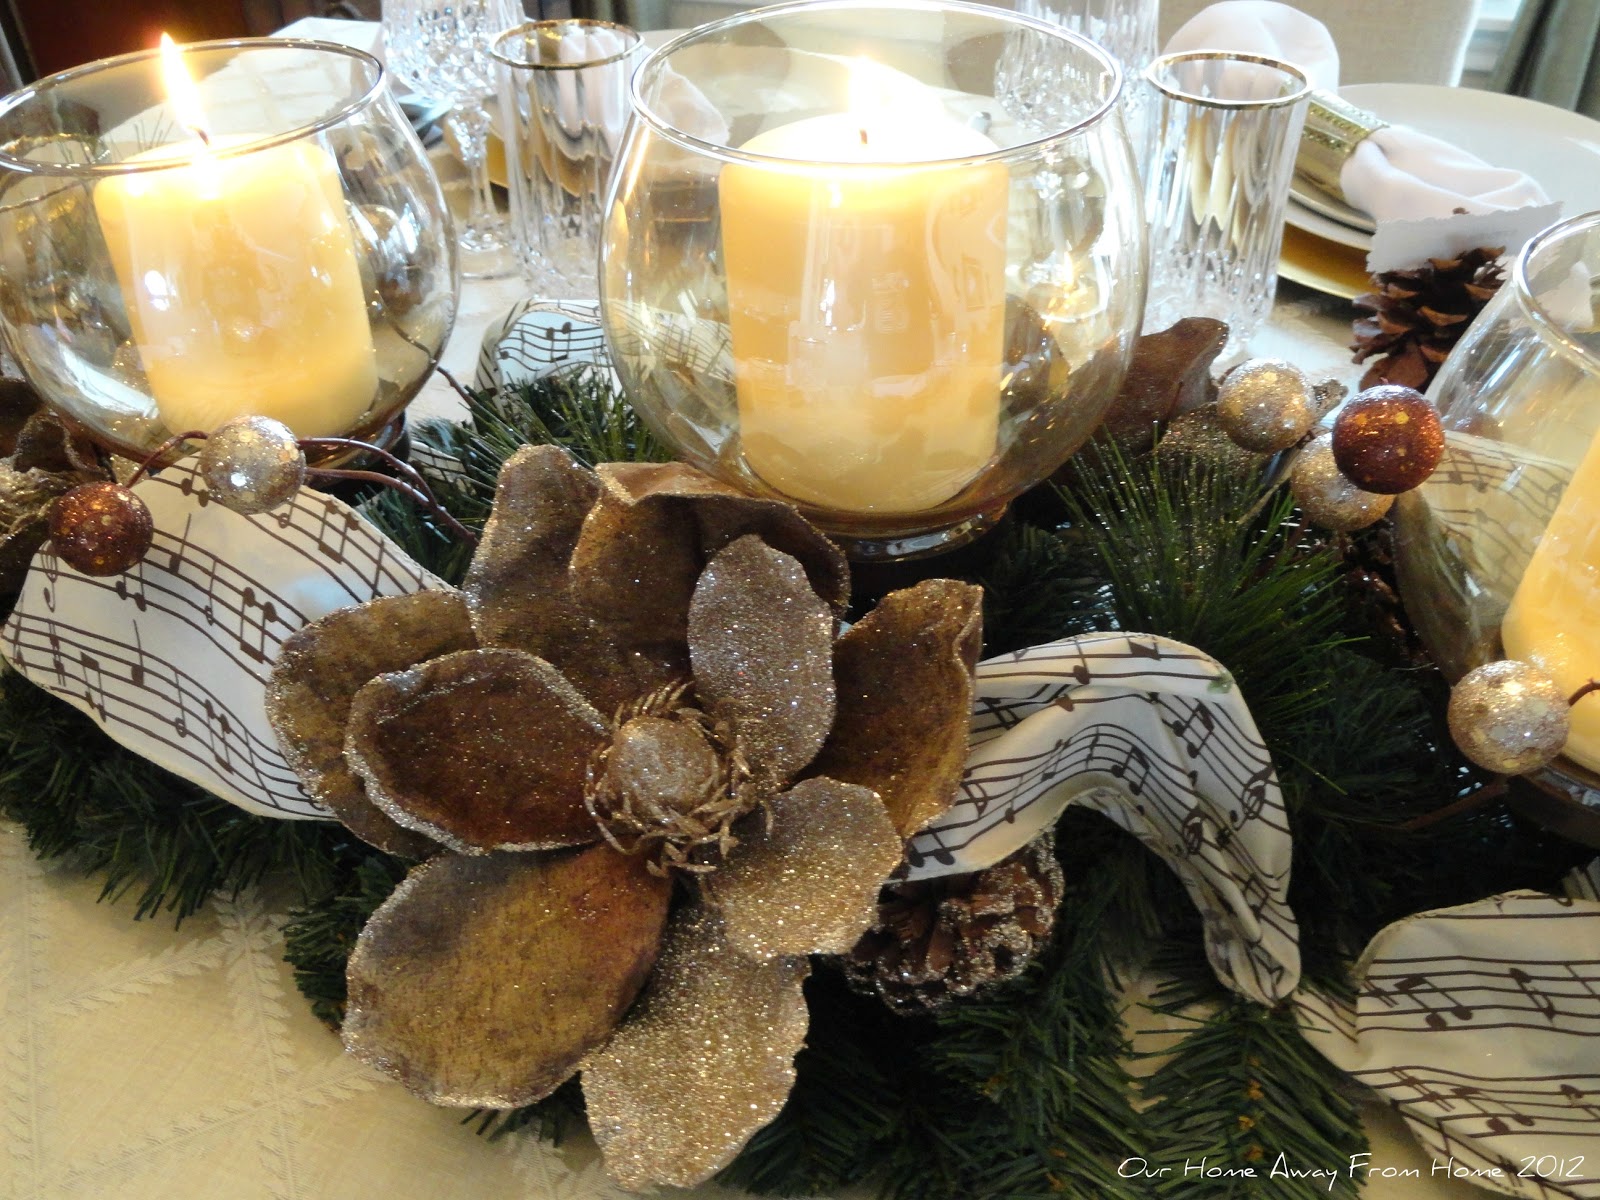
 And here is our Thanksgiving table.


I bought the Lenox tablecloth at Ross.
It was a super deal for $19.99.
Original price $75.00.
Isn't it pretty?

The china is super special to us.
It was my husband's grandfather wedding china and when he passed away, my Father-in-law gave it to me.
He told me then he knew I would take good care of it and enjoy using it for our family dinners.
It means more than ever to me now, since he also passed away last year. 
I paired it with our crystal d' Arques with gold rim.


At the last minute, I also made table place card
s and displayed them on pinecones.


From our family to yours, we just want to wish you all a very, very HAPPY THANKSGIVING!
Enjoy your Holiday weekend!


Monday, November 19, 2012

JUST SHOWING OFF!


Just a quick post show off my new header.
I can't believe I won!

Sonny, from 155 Dream Lane  had 
a Holiday Header Giveaway and I was picked as the winner.
I never win anything, so this was quite a surprise!

Today, she emailed me my new custom made header and
I am just so proud to display it on my blog.
Didn't she do an excellent job? She is so talented! 


Sonny, thank you from the bottom of my heart.
I just love it so much!  

See you all soon!


DOLLAR TREE FOR THE HOLIDAYS


Good morning, everyone!

Here we are, Monday morning, Thanksgiving just three days away.
So much to do!!!

This year, I decided to change my Holiday decor color scheme and, 
I don't know if that was such a bright idea! :)
I am really stressing now!
 There is tons of food to to prepare, many pies to bake,
last minute errands to run and our son will be home tomorrow!

So, what is a girl to do?
Of course, sit down and blog! LOL
 Best therapy ever!

Like I said, I wanted to do something different this year but not spend a lot of money changing everything, so the Dollar Tree came to the rescue.
 I had these metal vases I bought at Kirklands a while back during one of their big sales and only paid for them $5.00 each.
I knew I could do something with them! 


At Dollar Tree, I purchased little ornaments in
gold, red and green and some pretty ribbon.


And this is what I came up with


I wanted to add some branches, but they were very pricey in the stores, so my husband cut some from our yard and I used my favorite spray craft paint to give them a little bit of a Christmas look.


 To the branches I added tiny ornaments 
also from Dollar Tree.


 And here they are all dressed up for Christmas.


What do you think?
I was able to change the look of both vases for under $10.00
Can't wait to put it all together!
But, first, we have a huge Turkey to cook. :)

Thank all for visiting and, in case I don't get another chance this week, a very, very Happy Thanksgiving to everyone!


Friday, November 16, 2012

CHRISTMAS WOODEN LETTERS


Hello, everyone!

With very little time on my hands and running like a crazy woman, I wanted to quickly share with you guys the project that started 
my Christmas decorating madness!!! :)

I saw this idea many, many years ago at a store in Colorado and I have been wanting to incorporate it into my Christmas decor since then.
Well, this is the year!

I will show you all soon where I will be displaying them,
but I not quite ready to do that yet, so,
meanwhile, I will show you how I made them.


First, I looked for the letters everywhere and
just could not find the right size, so my husband
offered to make them for me, minus the O,
for which I used a small wreath
Thank you, honey!
He is such a good man! :)


When they were ready, I used on them
Gold metallic Rub & Buff.
Why Rub & Buff? Because it is what I had on hand
and it worked out beautifully!


They were dried in minutes,
so I traced them on scrapbook paper in 
different Holiday designs and cut and applied to the
front of the letters using mod podge.


I added a small pick from the Dollar tree to the wreath
and sprayed a little fake snow on it.


I did the same with the star in a different Holiday design
and at the last minute, I added to it a little cord
and a tiny holiday embellishment
 to give it a little character.


And here is the final project


Very, very easy and very economical!
Total cost of project was under $5.00.

Homemade letters:  $0.00
4 sheets Scrapbook paper: $1.20
Small wreath: $2.00
Christmas pick: $1.00

Hope you enjoyed this small project tutorial.
You will be able to see it very soon incorporated in my Christmas decor.

Meanwhile, have a great weekend and see you all soon!


Linked to:


Related Posts Plugin for WordPress, Blogger...